
By Troy Ivan
ibc@ichibancrafter.com
To avoid the mystery hotdog water that makes up a good portion of the retail vape cartridge market, people are increasingly very interested in making their own clean carts to control precisely what’s in them for their health and safety and make the best use of the cannabis they have. The process has been hard to decipher, leading to poor results in most cases and people giving. I’m here to change that. This post will provide a straightforward path to make clean, very potent, and the highest-quality pure full spectrum oil vape carts using straight Ethanol Honey Oil (EHO) made with ethanol extraction.

PROBLEMS NO MORE
Two primary factors have made making high-quality carts illusive for the home crafter. First, old-style wicked carts require the EHO to be thin enough to soak into the wick, so excessive cutting additives must be added. Ceramic coil “CCell” carts have changed that, and now straight EHO concentrate or distillate can be used with no problem and no need for adjusting viscosity. Terpenes can still be added for flavor or effect but are no longer required. The second problem comes from the tendency of THC-A from high-quality material “crashing” or crystallizing once loaded. Two ways to stop crashing: the concentrate can be substantially diluted with additives, and/or the EHO can be partially decarbed. Unfortunately, both solutions have not really led to quality cart-making for the home user. Dilution makes the carts less potent and increases harshness, while traditional decarb techniques completely ruin the EHO’s flavor and substantially oxidize the end product. Come to find out, we have been overcomplicating this for a long time! Using jar tech for partial decarb, we can easily make incredible, pure, full-spec oil for carts with potency up to +/- 85%. I’m going to show you how right now!
HIGH-QUALITY EHO CARTS
STEP 1: MAKE CLEAN EHO
For this demonstration, I used a very high-quality flower that was nicely cured, broke the nugs a little, causing as little damage as possible, and put the cannabis and ethanol separately on dry ice in a cooler overnight. When temps at -50°F, I performed a 1-hour wash, agitating every 15 minutes, filtered well with a Buchner funnel, processed under vacuum at low temps around 100°F, and stopped the process while the contents were still very loose.

NOTE: I always use only food-grade, non-denatured ethanol and recommend everyone else working with extraction in a home environment does as well.
If you are unfamiliar with the ethanol extraction process shown above, there are excellent resources to help get you started on this website (extractcrafter.com). The post explains how to make a low-cost DIY system and how to do the primary ethanol extraction from beginning to end. Here are some of the links:
Ethanol Extraction: Complete Breakdown
Super-Cooled QWET Wash for Cannabis Extraction Using Dry Ice
DIY Vacuum Still Part 1
DIY Vacuum Still Part 2
(Due to many equipment problems and company health problems, I can no longer recommend ExtractCraft equipment in good faith. I believe the DIY systems are much better value for money and better performance at this point.)
STEP 2: PURGE
I stopped the process a little early for maximum control, requiring a little added purging attention. The thin oil is set overnight to thicken a little before going into my vacuum oven for further post-process purging. A vacuum oven works well, but you can also use other methods like a regular vacuum chamber (included in a DIY system) with a heating pad or just take more time to allow natural evaporation and purging.


Many people obsessively focus on the amount of residual ethanol in the end product. The funny part is they never know why they are worried in meaningful terms or what concentration they consider okay. The facts are pretty simple: I can find no known adverse health effects published anywhere for residual ethanol in the minute concentrations we’re dealing with when consumed orally or by vaping. If you are concerned, this is what I suggest: do some research to find what level of residual ethanol you are comfortable with, purge accordingly, and have the extraction lab tested before proceeding. I’m not worried about minute food-grade ethanol residuals and purge using an experienced eye to get it low enough to establish stability and eliminate an ethanol flavor but not heavy enough to over-purge and negatively affect terpenes.
STEP 3: JAR TECH PARTIAL DECARB
This is where my game completely changed. Traditional decarb destroys flavor and terpenes, and CWD (Closed Wash Decarb link) is beyond most peoples’ abilities, leaving no viable, high-quality path forward for the home crafter…….until now. Jar tech has been used with hydrocarbon extractions for crashing and making diamonds for a while and, more recently, with rosin. I was getting frustrated trying unsuccessfully to apply the process to ethanol extraction when it hit me. Just use jar tech for partial decarb to make great carts! I’m excited because this just opened the door for us, and the quality is far better than any cart I’ve ever made. For more detailed info on the Jar Tech Decarb, please read the post-Jar Tech Decarb to Keep The Terpenes: Real FECO, Carts, and Terpy Deliciousness.
JAR TECH PARTIAL DECARB PROCESS:
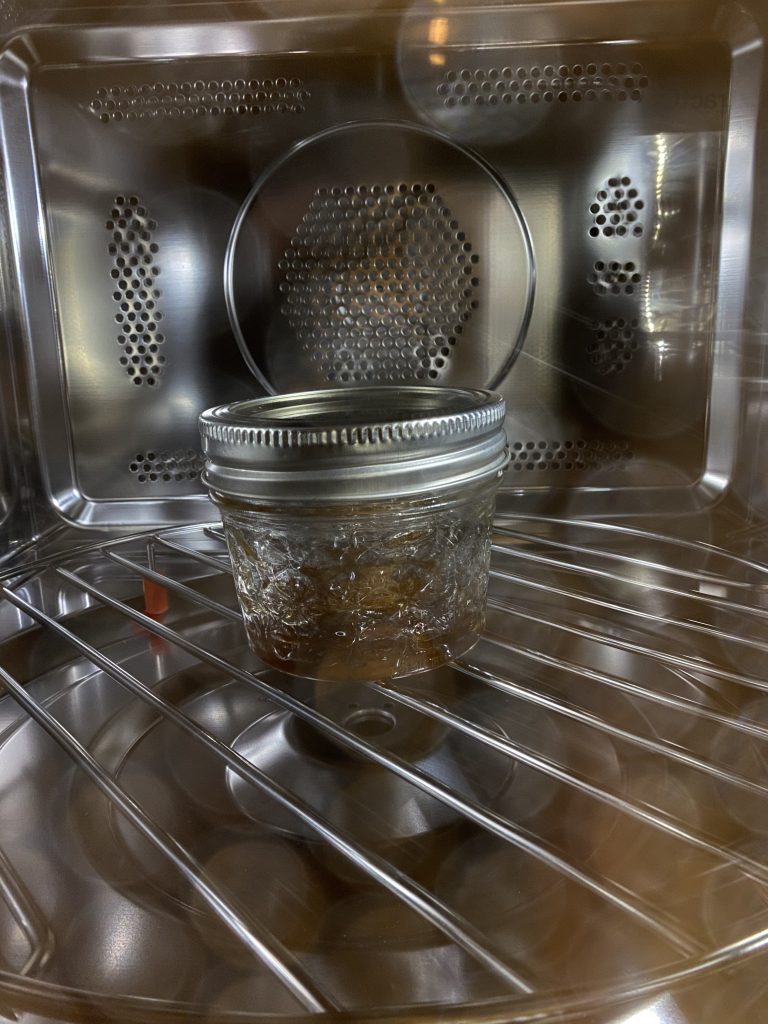
1) Fill a small 2 oz canning jar with 10 g-20 g of EHO.
2) Place the jar in a preheated oven, sous vide, Instant Pot, or whatever works best to maintain semi-even heat. A heating pad can also work with a longer ramp time added, but I haven’t tested it yet.
3) Heat for the prescribed time. (Please see the Jar Tech Decarb post for recommended temps and times.)
4) Allow it to cool.
5) Load into a warmed glass syringe when at a temp that can be handled safely.
(Excessive ethanol heated in a jar can become dangerous, so a safe degree of purging of the extraction is necessary before doing jar tech.)
JAR TECH ADDITIONAL NOTES:
A trick used in rosin jar tech to create positive pressure is to cool the jar and contents without being sealed, then seal it and add heat. As heating builds, the pressure in the jar will increase, helping achieve separation when trying to get THC-A to crash. This may also aid in maintaining as many terps as possible during decarb. The closed environment with positive pressure hopefully restricts the terps from trying to evaporate. Exercise reasonable caution when dealing with drastic temperature differences and glass jars.
There was an unexpected surprise after letting this jar cool to 100°F and getting it ready to load into the glass syringe. It appears the positive pressure in the jar restricted the CO2 bubbles breaking off during decarb and only released once the positive pressure was removed and stirred.

This bubble release didn’t happen the other three times I worked with this process, so I’m not sure why it happened here. As surprising and cool as it was, it wasn’t a problem. After allowing it to settle for a couple hours at 90°F, it returned from foam to normal EHO. I gave it a stir because you may see some separation with a terpene layer on top, so to evenly distribute, you may need to gently stir before loading.
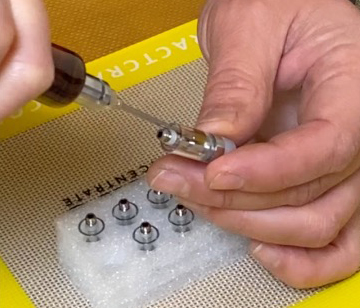
STEP 4: FILL CARTS
A 10 ml glass syringe with 14 gauge Luer-Lock blunt tips works well for small batches. The 14 gauge tip barely fits into the CCells I’m using, but the flow is so good it’s worth wrestling with a little. Confirm that the tips you’re using fit into the carts before starting. Filling a slightly warmed syringe from the top with warmed EHO and moving quickly allows you to manhandle the EHO through the syringe without much trouble. I used to try to suck oil up through the needle and then fill a cart or two at a time, and it never worked well; filling from the top and doing it all at once works much better for me. If you have trouble with the syringe flow, you can always hit it lightly with a bit of heat.


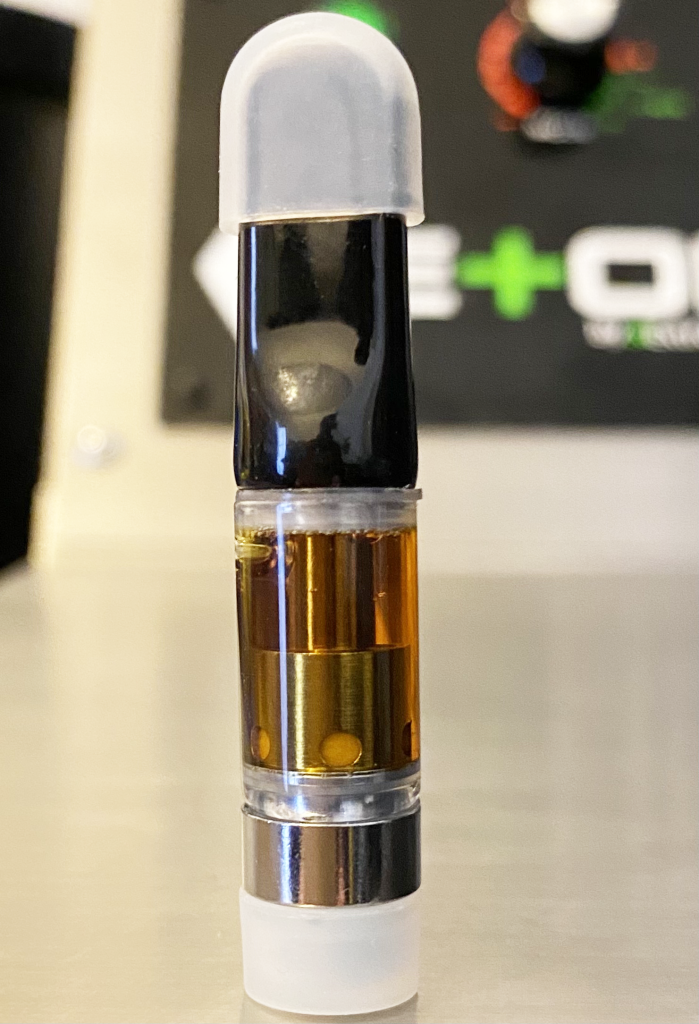
STEP 5: CAP AND START PUFFING
STEP 6: RECOVER WHAT YOU LOST
The two downsides to making high-quality carts are transfer loss and low yields. Luckily, both are entirely recoverable, getting very close to 100% efficiency of material use.
Transfer Loss:
When making carts, the EHO moves around a lot. It comes out of the loading vessel, onto a mat, into a jar, glass syringe, and finally, carts. With so many large contact surfaces and utensils used along the way, a good amount of oil gets left behind in transfer. Oil on easy-to-reach surfaces like mats can be collected with dab tools once it dries a bit, but jars and syringes make it more difficult. Use a little ethanol to break down the oil stuck on the jar, and soak the syringe parts in a Ziplock bag with as little ethanol as possible to cover surfaces. The ethanol used to break down and collect the oil can be run through the Source Turbo, air-dried, or saved to run in the next batch. There should be no loss in the end.
Yield Recovery:
Quality and yield end up representing opposing forces in every type of extraction. If you aren’t familiar with why that is I’m not going to get into it here, but if you are interested you can find the information in the post EXTRACTION AND YIELD: IT’S A BALANCE. Any yield left behind in the starting material can be picked up by running it a second time and bringing the total pick-up efficiency to nearly 100%.
APENDIX: ADDING TERPENES
This post was about making pure EHO carts, so I excluded guidance on adding terpenes. Even though they aren’t “necessary,” I like to add terps to my carts and encourage people to experiment with them because it’s fun and can add new dimensions to carts that are always made with the same material and become boring. You can mix terps into the jar just before loading the syringe or put a drop or two in a cart after filling and before capping.

Adding terps just to the top of a loaded cart isn’t what you see in professional processes, but it works REALLY well. What it lacks in proper process, it makes up for in flexibility of testing and playing with many profiles in a small sample size.
I hope you learned something; I sure did! Thanks for checking out the post.
STAY LIFTED MY FRIENDS !!!
CHECKOUT THE IBC EXTRACTION LOUNGE GROUP ON FACEBOOK

Thank you for sharing this process Troy! Two questions:
– to achieve positive pressure in the jar, do you cool the jar and EHO in the fridge or is room temperature sufficient?
-what time/temp would you recommend using jar tech if you want to fully decarb (eg for edibles)? I’ve been doing CWD 150F for 3 days (sous vide) prior to using the source and it gives my gummies a nice depth of flavour with the terpenes preserved. But if there’s a temp at which terpenes are still preserved that takes less than 3 days, that would be fantastic.
Who is Troy? I put in freezer for about 10 min. Temp and time is hard to say for sure as I haven’t had a chance to test. I’d assume it’s pretty much the same temp scale as other methods. Maybe 220F for 90-min + ramp?
Troy is the group moderator of the extractcraft user group
Excellent article. Thank you.
Sweet work.
Thank you
im wondering if this technique can be used after a full purge in a vac oven. After my wash and purge im left with a 8ram hockey puck of oil, Its quite stable. Did i take it too far already for this technique? As it stands i cant see this working in my my c-cells as its i feel its just too hard (even after warming it up it for my syringe )- wont it just get real hard again and not be viscous enough after i fill the carts, or will this decarb method permanently change the viscosity? TIA!!
1) decarb makes it slightly less viscous. 2) the heat will make it easier to get in a cart 3) you have to move expeditiously 4) use the largest tip you can 5) keep syringe warm
Preference of glass syringe? The interwebs are flooded with them and none seem to be that great.
I bought mine from Lab Society
Can i use hdpe bottle with little dropper to fill carts instead of using syringe?
how?
put shatter in the hdpe bottle
decarb 180F over night
if oil seperates into 2 layers, mix them
let it cool
now i should have ready decarbed oil
every time i would want to refill cart, i would heat bottle (150F maybe more), put tip in cart, and squeeze gently if needed.
I would use bottle that has a tip slim enough to fit in a cartridge.
(like this one but 10ml instead of 50ml http://www.kefo.rs/dropping-bottlespewith-dropper-tip-can-3). I won’t be able to squeeze out everything but there’s no need to. I’ll reuse bottle anyway.
To your knowledge, would that work?
I think there is very little chance that will work as well as you may imagine. Heating too much in open air is going to lower quality substantially. Using a glass syringe as mentioned and demonstrated is your best approach
Oil would get degraded even if bottle was air tight while decarbing? I have a cap for bottle and it doesnt leak
You can always try
Ok, in that case i won’t try it, you seem to be too sceptical ;c
Please publish a list of recommended tools/places where to buy proper tools: c cells, glass syringes, etc. Thank you. Scientific Glass is out of stock for 10 ml glass syringes.
Depending on which piece, the size, and other available equipment those recommendations can vary and it’s not really my wheelhouse to make equipment lists. What I have created is a great community in the “IBC Extraction Lounge” where you can either use the search function to see if anyone else has asked about a specific piece of equipment or simply post a question asking for recommendations. That is a much shorter route to exactly what you need. At some point there may be a store on the website I’m launching (www.IchiBanCrafter.com) with recommended equipment, but that may be a little while
Do you recommend doing this jar process vs decarbing flower before extraction/source turbo?
Mostly depends on what you are making. If you are just making edibles in small volume, like an ounce or two I’d probably just decarb traditionally before extraction. For other pursuits like dabs and stuff you really want to keep as many terpenes as you can, then you have to start thinking more about Jar Tech approaches.
Straight concentrate become very firm, that’s why you have to make sure to use good quality CCELL carts. What kind of cart did you use?
Super late response, this was in a place I never saw, my apologies.
You have to keep it warm. A hair dryer or something like that makes all the difference
I’m a little confused on the jar tech additional notes when does this step happen before partial decarb or after?
I think it mostly just explains what’s happening during the jar tek decarb. If there is something more specific you are asking please let me know.
Sorry Ichiban I was specifically referring to this part
“A trick used in rosin jar tech to create positive pressure in the jar is to cool the jar and contents without being sealed, then seal it and add heat. As heating builds, the pressure in the jar will increase, helping achieve separation when trying to get THC-A to crash”
When reading about the partial decarb method in this article and the other article you wrote about Jar tech decarb you say to tighten the lid to seal and heat. From my understanding of these notes it seems to be adding another step. As in heating the jar with the lid loose, letting it cool, then heating it again to cause the decarb.
I apologize if I’m misunderstanding the write up as I’m very no to extraction.
“ (Due to many problems with the equipment and company health I am no longer able to recommend ExtractCraft equipment in good faith. I believe the DIY systems are much better value for money and better performance at this point.)”
Do you still feel that way about their equipment?
Thanks.
More than ever
Hi there Troy, many thanks for all your efforts, your work is really precious for us!
I’ve been following meticolously your guide and at the end I did obtain a beautiful clear light golden extract, but unfortunately after the Jar tech decarb it turned dark, where do you think a mistake could happen?
The temp in the jar never got higher than 180-190 F for less than 1 hour..maybe the problem is that the batch was very small? (2 gr of EtOh in a 2 oz jar)
Best regards
Could be a lot of things. It may have been hotter than you thought. It may be just the characteristics of the strain. It might be when the material was harvested. It may be how the material was stored. It may be a lot of things. It also may be that the color really doesn’t matter but things like effect and medicinal qualities might be more important than what the eye thinks is the correct color.
Thanks for the reply Troy, the reply button doesn’t work so I have to leave a new comment here.
I was checking the temp with a thermal camera so I’m pretty sure it wasn’t higher than those temps, maybe if I use decarbed flowers I could avoid this problem what do you think about it?
By the way I used a -22 F freezer system and a Purple Kush Cake strain with 30% tested Thc.
Purple kush can carry pigment over? Decarbing flower will make it much less appealing I would think. Decarbing anything for any amount of time will lead to some shifts and oxidations. It’s highly unlikely it will remain the exact same color, decarbing flower will make it even darker.